Fan belongs to a list of must-have appliances for a lot of homeowners out there. It is an effective device that keeps the space inside the home at a cool and comfortable temperature.
Some people even cannot have optimal sleep without the help of a fan. However, due to some circumstances, you might need to take it down. If you want to know how to do it, here are several step-by-step tutorials on removing a ceiling fan.
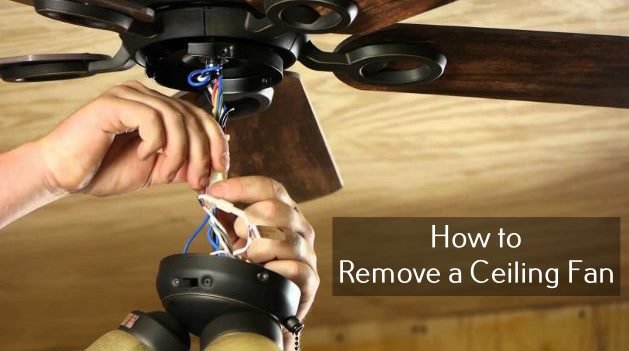
How to Remove a Ceiling Fan
You might need a helpful guide on removing a ceiling fan and replacing it with a light, cleaning it after, or fixing the error part. Whichever your reason is, there are some essential tools you need to prepare, such as a ladder, Allen key, or screwdriver.
Follow the steps below to get done with the process:
- Switch the electrical power in the main breaker panel.
- Step on the ladder. First, you have to release the canopy that encloses the mounting bracket. Use the screwdriver or Allen key to do so. Put the canopy down after you have successfully unscrewed it.
- It is an optional step, but it’s better to check that there’s no electrical power currently running. Use a voltage tester to do so.
- Release the wire and wire nuts. To avoid unwanted accidents when the power is back, bring the wire nuts on the wires after you have removed them.
- Keep the fan in your hand tightly, then slip the ball from the mounting bracket on the upper part of the fan pole.
- The next step in removing a ceiling fan is to put the fan on the ground carefully.
- Unscrew the mounting bracket that is typically attached by double screws to the electrical box. Then release the bracket. Bring back the screws in the electrical box so they won’t lose the next time you need them.
How to Remove a Hunter Ceiling Fan
Hunter fans are known for their diverse styles that match any interior design. Here are the steps on how to remove a ceiling fan from the Hunter brand that has canopy trim:
- Turn off any electrical power that is supplied to the room to prevent and make sure you won’t get electroshocked during the fan’s uninstallation process.
- Reach out the Hunter fan’s canopy trim ring by climbing the ladder.
- Carefully unscrew any light bulbs that are attached to the fan and release them.
- Look for the tab indicators by feeling the trim ring of the canopy.
- By using your fingers, press the trim ring to the left and right buttons on the tab indicators. Then release it.
How to Remove a Hampton Bay Ceiling Fan
Hampton Bay ceiling fans are quite challenging to remove compared to the majority of other ceiling fan models. It is because they have concealed screws and are relatively heavy. Regardless of the difficulty, here are the steps on how to remove ceiling fan cover with hidden screws:
- Switch off the electrical power to the ceiling fan on the main breaker to prevent any accidents. It is also advisable to switch off the entire wall switches as safety measurements.
- Remove the screws that secure the fan’s blade arms to the room’s ceiling using a screwdriver.
- Remove the screws that attach the mounting bracket attached to the ceiling into the electrical box by using a drill and screwdriver.
- Check the wire’s conditions.
- Release the wire nuts that secured the wires.
- The last step in removing a ceiling fan is to release the fan carefully and put it down.
Read also: How to Attach Wood to Concrete without Drilling: 2 Tricks to Nail It
How to Remove a Ceiling Fan with a Downrod
Sometimes, the ceiling fan comes with a downrod, a metal pipe that connects mounting brackets with the motor housing. Here are the steps on how to remove a ceiling fan that has a downrod.
- Turn the electrical power that supply the ceiling fan.
- Remove the canopy.
- Release the wire nuts by using a screwdriver.
- Carefully remove the fan and put it down.
- Remove the pin and clip that secure the downrod to its place.
- Release the mounting bracket by unscrewing it and removing it from the ceiling.
As mentioned previously, there are plenty of different reasons that make you need to remove a fan – whether it is for maintenance, cleaning, or replacement reasons.
Read also: Turn Of the Century Ceiling Fan: Installation and Maintenance Tips
It is better to understand your fan mechanism before you learn and practice several guides on removing a ceiling fan above.