Are you having trouble installing your ceiling fan? It can be frustrating and even risky. Issues like wrong mounting, wiring mistakes, and neglect can make a simple task hard.
This guide will help you through every step of installing your ceiling fan. You’ll learn how to install, balance, and maintain your Turn Of the Century Ceiling Fan. With these tips, you’ll make your space better and safer.

Understanding Turn Of the Century Ceiling Fan Components
Before you start installing a ceiling fan, it’s important to know the key parts. I’ll explain the main parts of a Turn of the Century ceiling fan. This will help you understand its design and how it works.
Essential Parts and Features
Every ceiling fan has important parts that work together. The main parts are:
- Motor housing
- Blade assembly
- Mounting bracket
- Electrical wiring connections
- Control mechanisms
Motor and Blade Specifications
The motor is the heart of a ceiling fan. In Turn of the Century models, the motor is strong and quiet. It’s in a metal housing that reduces vibrations and ensures smooth running.
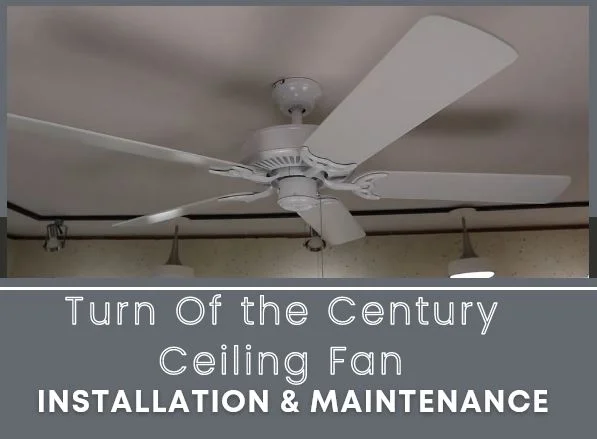
The blades are also key for fan installation. These fans have five balanced blades made from quality materials. The blades are sealed to keep moisture out and stay strong over time.
Control Mechanisms and Switches
Control options are important for your ceiling fan experience. Turn of the Century fans have different control options, including:
- Pull chain switches for speed control
- Reverse direction switches
- Optional remote control compatibility
Knowing these parts will make installing your fan easier. It will also help you see the engineering that goes into your new ceiling fan.
Pre-Installation Safety Guidelines
Safety is key when installing a ceiling fan. I’ve learned that getting ready right can avoid accidents and make the job easier. Before starting with your Turn of the Century ceiling fan, here are some important safety tips to keep you safe.
Working with electricity needs careful attention and respect for dangers. The first and most important safety tip is to turn off power at the circuit breaker. Don’t just turn off a wall switch – make sure to cut off the electrical source completely to avoid shock risks.
- Verify power is off using a non-contact voltage tester
- Wear protective safety glasses during installation
- Use insulated tools when working with electrical connections
- Work in a well-lit area with stable footing
Wearing the right gear is vital for ceiling fan installation. I suggest wearing rubber-soled shoes to avoid electrical shock and gloves to protect your hands from cuts or electrical contacts. Make sure your workspace is clean, organized, and safe from tripping hazards.
Always read the manufacturer’s installation instructions carefully. Each ceiling fan model has its own safety needs, so take time to understand the specific guidelines for your Turn of the Century fan before starting.
- Keep children and pets away from the work area
- Have a first aid kit nearby
- Work with a helper if possible for complex installations
By following these safety tips, you’ll make your ceiling fan project safer and reduce risks.
Tools and Materials Required for Installation
Getting ready for a ceiling fan installation means having the right tools and materials. Whether you’re a DIY expert or new to this, being prepared makes the process easier and faster.
Before you start, gather all the tools and parts you need. This step helps avoid delays and makes the installation smooth.
Basic Installation Tools
- Sturdy ladder
- Electric drill with 9/64″ drill bit
- Phillips head and flathead screwdrivers
- Wire strippers
- Pliers
- Voltage tester
- Adjustable wrench
- Measuring tape
Electrical Components
- Wire nuts
- Electrical tape
- Circuit tester
- Electrical wire connectors
- Wire gauge appropriate for your home’s electrical system
Additional Materials Needed
- Mounting bracket
- Ceiling fan support brace (if not already installed)
- Protective work gloves
- Safety glasses
- Pencil for marking
- Level
Pro tip for successful ceiling fan installation: Always double-check that you have all materials before starting. This saves time and prevents frustrating mid-project delays. If you’re uncertain about any step, consult a professional electrician to ensure safe and proper installation.
Mounting Bracket Installation Process

Starting your fan installation for a Turn of the Century ceiling fan? The mounting bracket is your first key step. I’ll guide you through securing this essential part for a safe and stable fan setup.
First, make sure your electrical box can handle the fan’s weight. A standard requirement is a box rated for at least 70 pounds. This ensures safety during installation.
- Check the electrical box’s weight rating
- Inspect ceiling joists for proper support
- Ensure mounting surface is completely level
- Use appropriate mounting hardware
Different ceilings need different mounting methods. For flat ceilings, a rigid bracket is best. But, angled or sloped ceilings might need a special system for correct fan alignment.
Here are some tips for mounting success:
- Use a stud finder to find ceiling joists
- Mark precise mounting points
- Secure bracket with heavy-duty screws
- Double-check bracket stability before moving on
Proper mounting of the bracket ensures your century ceiling fan works well and safely for years.
Read also: Tutorial on How to Find a Stud in the Ceiling
Wiring Your Ceiling Fan Correctly
When you replace a ceiling fan, knowing how to wire it is key. It’s about safety and making sure it works right. Electrical work needs focus and following safety rules closely.
Before you start, get your tools ready and take safety steps. It’s important to avoid electrical dangers when installing a ceiling fan.
Color-Coding and Wire Connections
There are four main wire colors in ceiling fan wiring. Each color has a special job:
- Black wire: Connects to the fan motor’s power
- Blue wire: Runs the light kit’s circuit
- White wire: Completes the circuit as the neutral wire
- Green/Bare copper wire: Grounds the system for safety
Grounding Instructions
Grounding is vital when replacing a ceiling fan. Always connect the ground wire to keep things safe. If your box doesn’t have a ground, get a pro to fix it.
Circuit Testing Procedures
When working with electricity, safety comes first. Here’s what to do during your fan replacement:
- Switch off the power at the breaker
- Check with a voltage tester to make sure it’s off
- Make sure wire connections are tight
- Test the circuit before finishing the job
By following these wiring tips, you’ll do a safe and effective ceiling fan replacement. Your new fan will work well for many years.
Blade Assembly and Attachment Guide
Installing blades on your ceiling fan needs careful attention. Different models have unique ways to attach blades, affecting both how well they work and how they look. I’ll guide you through the essential steps for a secure and balanced setup.
Before starting, figure out how your fan’s blades attach. Most fans use one of three main methods:
- Blade iron attachments
- Mid-body blade connections
- Snap-on blade mechanisms
Start by organizing your parts. Lay out all the blade hardware on a clean, flat area. Make sure you have the right number of screws and they fit the fan’s needs. Some fans need special screws for the blades to line up right.
To attach the blades right, follow these steps:
- Align the blade with the fan’s mounting bracket
- Put in screws carefully to avoid damaging them
- Tighten screws evenly to stop the blade from wobbling
- Check if the blade is balanced after you’ve installed it
Getting the blades installed right is key for your fan to work smoothly. Take your time, be careful, and make sure each blade is securely attached. This will help avoid any problems later on.
Installing Light Fixtures and Accessories
Light fixtures can change how your room looks and works. I’ll show you how to install light kits for your century ceiling fan. This will make your fan look better and light up your room well.
Read also: How to Clean Frosted Glass in Light Fixtures
Most Turn of the Century ceiling fans have light kits that are easy to install. Before you start, make sure you have all the tools you need. Also, read the instructions from the manufacturer carefully.
Light Kit Assembly Steps
- Disconnect power at the circuit breaker
- Inspect the light kit components
- Align mounting brackets correctly
- Verify all hardware is included
- Check electrical connections
Globe and Bulb Installation
Installing globes and bulbs right is key for looks and light. The light kits for your century ceiling fan usually have many options. This lets you match your room’s style.
- Select appropriate bulb wattage
- Carefully thread bulbs into socket
- Attach glass globe securely
- Ensure even tightening of mounting screws
- Test light functionality
By following these steps, you’ll get a lighting setup that matches your ceiling fan. It will also light up your room perfectly.
Maintenance and Care Instructions
To keep your Turn Of the Century Ceiling Fan working well, regular maintenance is key. I’ll share expert tips to help you keep your fan running smoothly. This way, you can avoid needing to replace it and enjoy its efficiency for a long time.
Cleaning Your Ceiling Fan
Cleaning your Turn Of the Century Ceiling Fan regularly is essential. Here’s a simple guide to follow:
- Disconnect power before cleaning
- Use a drop cloth to protect flooring
- Use a microfiber cloth or extendable duster
- Clean blades gently to avoid damage
Lubrication Techniques
Proper lubrication is important for a smooth ceiling fan operation. Here are the steps to follow:
- Turn off power completely
- Remove canopy cover carefully
- Locate motor housing oil ports
- Apply light machine oil sparingly
- Manually spin blades to distribute lubricant
Checking Connections and Screws
Loose screws can cause your fan to wobble and may be unsafe. It’s a good idea to check them every month:
- Check mounting bracket attachment
- Verify downrod and canopy screws
- Examine blade attachment screws
- Tighten any loose connections
- Replace damaged screws immediately
By following these maintenance tips, you’ll keep your Turn Of the Century Ceiling Fan in great shape. Regular care helps avoid the need for replacement and keeps your fan running efficiently for years.
Troubleshooting Common Issues
Installing a ceiling fan is usually easy, but sometimes problems pop up. Knowing how to fix these issues can keep your fan working well and last longer. This is important during ceiling fan installation.
As a homeowner, I’ve faced many ceiling fan problems. Here are some safety tips for common issues you might see.
Motor Performance Problems
Motor overheating can happen for a few reasons:
- Dust on motor parts
- Not enough air flow
- Electrical issues
Blade Balance and Stability
Blade wobbling is a big problem that can make your fan less efficient. Here’s how to check it:
- Turn off the fan’s power
- Make sure blade screws are tight
- Look for any damage on the blades
- Use a balancing kit if needed
Electrical Malfunction Diagnostics
| Symptom | Potential Cause | Recommended Action |
|---|---|---|
| Intermittent Operation | Loose Wiring | Check electrical connections |
| No Start | Capacitor Failure | Replace capacitor |
| Unusual Noises | Mechanical Wear | Lubricate moving parts |
If simple fixes don’t work, it’s time to call a pro. For Turn of the Century fans, their service team is at 1-800-887-6326.
Always put safety first when installing or fixing ceiling fans. If you’re not sure about a repair, get a licensed electrician’s help.
Conclusion
Installing a century ceiling fan needs patience, precision, and a good understanding of the steps. I’ve shown you every important part of this guide. This way, you can set up your new fan easily and without stress.
Pay close attention to every detail during installation. This will greatly improve your home’s comfort and energy use. Each part we talked about is key to a smooth, working ceiling fan setup. It will last for many years in your home.
Always put safety first. Check your electrical connections well, make sure it’s mounted right, and don’t hurry. A well-installed century ceiling fan looks great and works well. It brings cool air and beauty to your home.
Now you know how to install your ceiling fan confidently. Take your time, follow each step carefully, and enjoy the cool, refreshing comfort of your perfectly installed fan.


