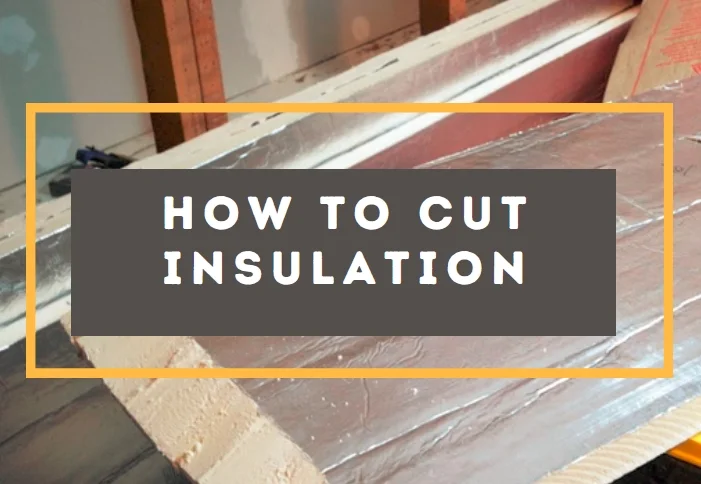
Do you struggle with messy, uneven cuts when working with foam insulation? Many DIY fans find it tough, leading to wasted materials and project delays. Bad cuts can also hurt your home’s energy efficiency and cause gaps.
I’ve put together a detailed guide to help you cut foam insulation like a pro. It doesn’t matter if you’re new or have experience. I’ll show you how to make clean, precise cuts every time. You’ll save time, money, and boost your home’s insulation.
This guide covers everything from choosing the right tools to mastering cutting techniques. It will change how you approach foam insulation projects. Get ready to do your insulation work with confidence and precision!
Essential Tools and Equipment for Cutting Foam Insulation
When you start a foam insulation project, the right tools are key. They help you get a clean, professional look. I’ve learned that choosing the right tools is important for making precise cuts.
For cutting foam insulation, you need a few important tools. These tools help you work accurately and efficiently. Let’s look at the essential tools you’ll need to begin.
Basic Cutting Tools for Foam Insulation
- Utility knife with replaceable blades
- Hot wire cutter for precise foam cuts
- Keyhole saw
- Foam cutting blades for power tools
A sharp utility knife is my top choice for most foam insulation tasks. It’s perfect for cutting thinner foam boards. For thicker foam, a hot wire cutter is essential. It makes smooth edges with little mess.
Essential Safety Equipment
| Safety Item | Purpose |
|---|---|
| Safety Goggles | Protect eyes from foam particles |
| Dust Mask | Prevent inhalation of foam debris |
| Work Gloves | Protect hands during cutting |
| Protective Apron | Shield clothing from foam dust |
Remember, safety is important when using cutting tools. Always wear the right protective gear. It helps prevent injuries and keeps you safe from foam particles.
Understanding Different Types of Foam Insulation Materials
When you work with foam insulation styrofoam, knowing the different materials is key. Each foam type has its own traits that impact how you cut it and how well it works.
Foam insulation comes in several main types, each with its own features:
- Expanded Polystyrene (EPS): Lightweight and cost-effective
- Extruded Polystyrene (XPS): Denser and more moisture-resistant
- Polyurethane Foam: Excellent thermal performance
- Polyisocyanurate (Polyiso): High R-value insulation
Choosing the right tools for cutting foam is very important. Different foams need different cutting methods. For example, lightweight EPS might be cut with a standard utility knife. But denser XPS might need hot wire cutters or special saws.
From my experience, picking the right cutting method for your foam type is essential. It ensures clean cuts and saves material. Knowing these details can greatly improve your insulation project.
Professional tip: Always follow the manufacturer’s advice for cutting specific foam types. This will help you get the best results and keep the material in good shape.
Safety Precautions and Workspace Setup
When working with energy-efficient insulation, safety is key. Cutting foam insulation needs careful preparation and protective measures. This ensures your safety and the best results.
Setting up a safe workspace is vital for insulation cutting. Proper preparation can prevent accidents and health risks from foam materials.
Read also: How to Cut FRP Panels in Proper and Safe Way
Creating a Safe Work Environment
- Choose a well-ventilated area with plenty of airflow
- Clear the workspace of unnecessary clutter
- Set up a stable, flat cutting surface
- Ensure good lighting for precise cuts
Essential Personal Protective Equipment
Insulation cutting safety requires full personal protection. Here are the critical pieces of equipment you’ll need:
- Dust mask or respirator
- Safety goggles
- Cut-resistant gloves
- Long-sleeved clothing
- Closed-toe shoes
When working with energy-efficient insulation, extra precautions are a must. Foam materials like polystyrene can release harmful particles and fumes. These can cause respiratory and skin irritations.
Ventilation Considerations
Proper air circulation is key when cutting foam insulation. I suggest working near an open window or using fans for good airflow. If possible, set up your workspace outdoors or in a well-ventilated area. This minimizes exposure to harmful dust and fumes.
Remember, investing in safety equipment and preparing your workspace well helps. It ensures clean, precise cuts and protects your health during insulation projects.
How to Cut Foam Insulation: Step-by-Step Guide
Cutting foam insulation needs precision and the right tools. I’ll show you a reliable way to make clean, accurate cuts. This will make your insulation project look professional.
Before you start, make sure you have these tools:
- Tape measure
- Straightedge
- Sharp knife or utility blade
- Felt-tip pen
- Thin cardboard (for templates)
Getting accurate measurements is key. Use a tape measure and make a cardboard template for complex shapes. Mark your lines with a felt-tip pen and a straightedge for precision.
| Foam Thickness | Recommended Cutting Method |
|---|---|
| Up to 1/2 inch | Single-pass cut with sharp blade |
| 1/2 to 2 inches | Multiple shallow passes |
| Over 2 inches | Use specialized cutting tools |
When cutting, keep your hand steady and apply even pressure. Practice on scrap pieces to get better. For straight cuts, use a sharpened putty knife or a sharp serrated knife with a straightedge guide. For curves, hold the knife perpendicular and use short sawing motions.
Here are some key tips for perfect insulation board cutting:
- Always use sharp blades
- Apply even pressure
- Make multiple light passes for thick materials
- Support the foam on a stable, flat surface
By following these steps, you’ll get clean, precise cuts. This ensures your foam insulation fits perfectly and works well.
Using a Hot Wire Cutter for Precise Cuts
A hot wire cutter is a must-have for foam insulation projects. It makes your work look like a pro did it. This tool cuts through foam with ease and precision.
Learning to use a hot wire cutter takes some skill. It heats a thin wire to cut through foam smoothly. It’s a powerful tool for foam insulation.
Optimal Temperature Settings
Choosing the right temperature is key for foam cutting. Each foam type needs a specific heat to cut well without damage.
- Polystyrene foam: 200-250°F range
- Polyurethane foam: 250-300°F range
- Expanded polystyrene: 180-220°F range
Professional Cutting Techniques
For the best cuts, keep your hand steady and the wire straight. Always cut in a well-ventilated area and wear safety gear.
With practice, you’ll get better at making clean cuts. Move slowly and keep your strokes even for the best results.
Hand Saw and Utility Knife Cutting Methods
Cutting foam insulation doesn’t need expensive power tools. A utility knife and hand saw work great for precise cuts. These tools give you control for accurate and careful cuts.

For a utility knife, mark your line clearly on the foam. Use a straight edge or metal ruler for straight cuts. This helps keep your cuts precise.
- Choose a sharp utility knife with replaceable blades
- Apply gentle, consistent pressure while cutting
- Make multiple shallow passes instead of one deep cut
- Replace blades frequently to maintain sharp edges
Hand saws are also good for cutting foam insulation. They’re best for thicker panels or longer cuts. I like using a fine-toothed saw to avoid rough edges and crumbling foam.
| Tool | Best Used For | Cutting Technique |
|---|---|---|
| Utility Knife | Thin foam panels | Multiple light passes |
| Hand Saw | Thick foam insulation | Steady, controlled strokes |
Always cut in a well-ventilated area and wear protective gear. Take your time, keep your hand steady, and focus on safety.
Power Tool Techniques for Large Projects
For big insulation board trimming jobs, power tools are key. They make big projects easier and more precise. Choosing the right tool is very important for your work.
Professionals use two main tools for cutting foam: circular saws and jigsaws. Each has its own strengths for different cuts.
Circular Saw Cutting Strategies
A circular saw is great for long, straight cuts in foam. Here are some tips for clean cuts:
- Choose a fine-toothed blade for smooth cuts
- Set blade depth a bit deeper than the foam
- Use a straight-edge guide for perfect alignment
- Keep steady, consistent pressure while cutting
Jigsaw Precision for Complex Shapes
For tricky cuts or curved edges, a jigsaw is best. Use foam-cutting blades with few teeth to avoid tears.
- Choose variable speed settings
- Use slow-to-medium speed for better control
- Support the foam to stop vibration
- Make template guides for the same shape
Learning these power tool skills will help you tackle big insulation jobs with ease and precision.
Common Mistakes to Avoid When Cutting Foam
Cutting foam insulation can be tricky, even for DIY experts. I’ve learned some key tips to help you avoid common mistakes. These mistakes can ruin your project.
One big error is not considering the cutting tool’s thickness. A utility knife or crafting knife might cut narrower than you expect. This can mess up the fit of your insulation materials.
- Measure blade thickness before cutting
- Adjust cutting lines to compensate for tool width
- Use precise measuring tools
When working with foam insulation, measuring is very important. The saying “measure twice, cut once” is very true here. Rushing through cuts can lead to expensive mistakes. These mistakes can waste materials and time.
| Common Cutting Mistake | Potential Consequence | Prevention Strategy |
|---|---|---|
| Dull Blades | Jagged, Uneven Cuts | Regularly Sharpen or Replace Blades |
| Incorrect Tool Selection | Torn or Compressed Foam | Use Specialized Foam Cutting Tools |
| Excessive Pressure | Damaged Foam Surface | Apply Gentle, Consistent Pressure |
When cutting foam, choose the right tools. A utility knife, foam cutter, or hacksaw is best. Don’t use household scissors or dull knives, as they can tear or compress the foam. Always saw gently and with minimal pressure to keep the foam intact.
Pro tip: A sharpened putty knife is great for cutting foam insulation. With a straightedge, it makes clean, precise cuts, even in thicker foam boards.
Professional Tips for Clean and Accurate Cuts
Mastering insulation board cutting needs precision and skill. As a DIY home insulation fan, I’ve picked up several pro techniques. These can turn your project into expert-level work.
Getting clean cuts in foam insulation is more than just the right tools. It’s about knowing the detailed techniques that really count. I’ll share some insider tips to help you achieve professional results.
Precision Measurement Techniques
Before you cut any insulation board, getting your measurements right is key. Here are my top tips:
- Use a metal straightedge for perfectly straight lines
- Mark cutting lines with a sharp pencil for minimal material disruption
- Double-check measurements before making any cuts
- Create a dedicated cutting surface with a sacrificial board underneath
Edge Finishing Strategies
After cutting your foam insulation, smooth edges are vital. I suggest using fine-grit sandpaper. It helps remove rough spots and makes connections between panels seamless.
Quality Control Checklist
To ensure top-notch results, follow this quick quality control process:
- Verify dimensional accuracy of each cut
- Check for smooth, even edges
- Ensure no material fraying or chipping
- Test fitting of insulation boards before final installation
By using these professional tips, you’ll improve your insulation board cutting skills. You’ll get results that look like they were done by a seasoned pro.
Specialized Cutting Techniques for Different Application
Working with foam insulation can be tricky. You need advanced techniques for energy-efficient insulation. This is true, even in complex spaces.
I’ve come up with special cutting methods for tough insulation jobs. These methods help fit insulation around tricky parts of buildings. They keep your insulation energy-efficient.
- Pipe Cut-Out Technique: Create precise circular or oval openings
- Electrical Box Adaptation: Modify foam insulation for perfect electrical box integration
- Curved Surface Cutting: Shape insulation for rounded or irregular surfaces
My top techniques include using templates and strategic scoring. These methods let you make detailed cuts that regular tools can’t.
| Cutting Technique | Best Used For | Difficulty Level |
|---|---|---|
| Hot Wire Precision Cutting | Complex geometric shapes | Advanced |
| Template-Based Cutting | Repeat pattern insulation | Intermediate |
| Scoring and Snap Method | Smooth straight cuts | Beginner |
Learning these cutting techniques will boost your insulation quality. It will also make your energy efficiency better.
Conclusion
After exploring foam insulation cutting techniques, you’re now ready to take on your projects. You’ve learned about the right tools, precision cutting, and safety. This journey from beginner to expert is rewarding.
Cutting foam insulation is more than just making clean edges. It’s about making your home more comfortable and energy-efficient. By mastering these techniques, you’ll save on energy costs and improve your home’s warmth.
Whether you’re using rigid foam boards or closed-cell materials, be patient and precise. Start with simple projects and invest in good tools. Remember, every DIY beginner starts where you are, learning and improving with each project.
The skills you’ve gained are more than just cutting foam. They show your dedication to making your home more energy-efficient and your DIY skills better. Keep practicing, stay curious, and enjoy the pride of creating top-notch insulation installations.


