The floor and furniture are already clean, but the popcorn ceilings can turn you down. Do not stay still and remove them immediately.
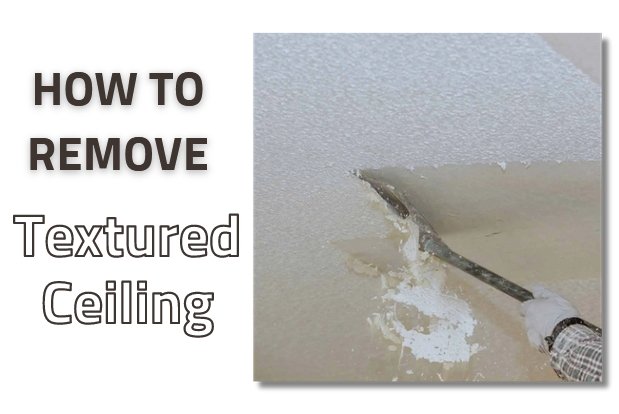
Removing textured ceilings, often referred to as popcorn or stipple ceilings, can be a messy but manageable DIY project. Here’s a general guide on how to remove textured ceiling:

How to Remove Textured Ceiling to Get a Beautiful Ceiling at Home
Prepare the Tools and Materials
Before starting to remove the textured ceiling, make sure you have the required materials and tools. Here is a list of items you need:
- Dust mask
- Goggle
- Protective clothing
- Sprayer
- Plastic drop cloths
- Popcorn scraper, it can be a drywall taping knife or wide putty knife
- Newspaper or rosin paper
- A mud pan or bucket
- Sandpaper
- Stepladder
Do a Test
After preparing the tools, scrap a small area to learn about the ceiling condition. Some textures can come off without water, but mostly, wetting is the best method.
In several cases, wetting does not help because the texture has been painted. The testing helps you find another way if it does not work out. You can hide the mixture or tackle the hard scrapping job.
To keep yourself first during the removal process, get an asbestos test. Textured ceilings built before 1980 might contain asbestos that causes lung cancer. Remove a small amount of the texture and get it tested at the local health department.
In case you find the ceiling contains asbestos, contact an asbestos removal contractor or cover the popcorn ceiling with new drywall.
Get ready!
If you find the test negative, you may continue the process. Cover the surface, including your floors and walls, with plastic drop cloths to make the later cleaning process easier. Avoid using canvas drop cloths because they can cause the water to soak through.
After that, move your furniture out of the room you are going to work in. Do you have the ceiling fixtures and fans? Remove them too, to avoid them getting covered with the wet popcorn or accidentally sprayed by the water. After that, stuff rosin paper or newspaper inside the canister lights to keep them dry.
Wet the Ceiling
After everything is settled, mist your ceiling using the water sprayer. Then, let the water soak for around 15 minutes before you start scrapping. Respray the ceiling if you do not see the texture gets softened and wait for another 15 minutes.
Remove the Textures
To keep the water function working, limit the area for spraying and scraping at a time. You can try about 4 x 4 ft. When working too large, chances are the other area is already dry, and you have to respray it.
Scrap the texture and use a mud pan or a bucket to catch the wet popcorn. It helps you not track all the popcorn all over the place, which can block you from moving the ladder around.
Refinish the Ceiling
After scraping, the ceiling will probably not be smooth yet. You will see small gouges and dings to fix before painting the ceiling.
Read also: How to Remove Paint from Vinyl Siding Easily
Safety Tips:
- Wear safety glasses, a dust mask, and gloves to protect yourself from dust and debris.
- If the ceiling was painted before, it may contain lead. Take appropriate precautions, and if in doubt, consider professional testing and assistance.
Keep in mind that removing textured ceilings can be a labor-intensive process, and the steps may vary based on the specific type of texture used. Always follow safety guidelines and local regulations when dealing with home improvement projects.


